We mentioned on our podcast a few weeks ago that we had to quickly implement some storage systems in our new house just so we had a spot to unpack everything. Like there was a point on Day 3 or 4 of unpacking where we were faced with the reality that nothing else could get put away until we added some shelves to the narrow hall closet next to the bathroom and this laundry closet.
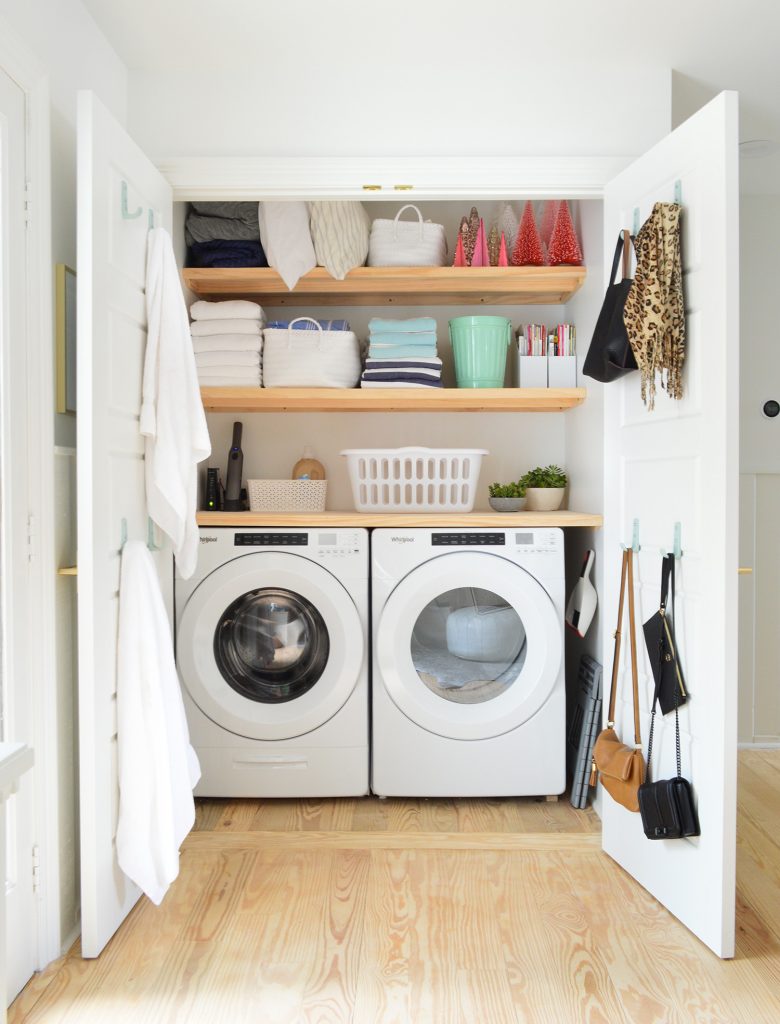
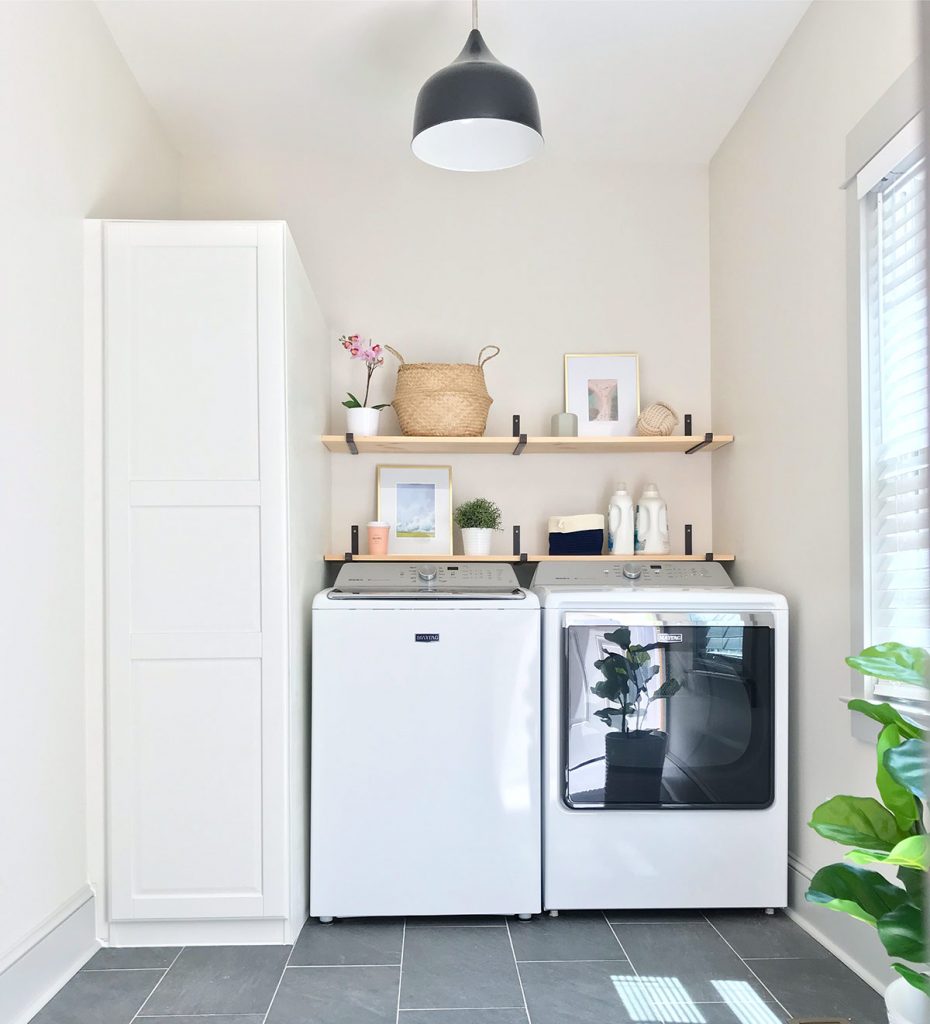
As soon as these shelves & our new counter were up, we were amazed by how much we could store. This closet is a complete workhorse (and dare I say a showhorse? I mean look at those bottle brush trees). And since many of you asked for the DIY details, we’re going to cover why & how we built these shelves. Anyone can tackle this. It’s extremely doable and your home improvement store might even be able to cut things for you so you can just go home and screw them right into your studs.
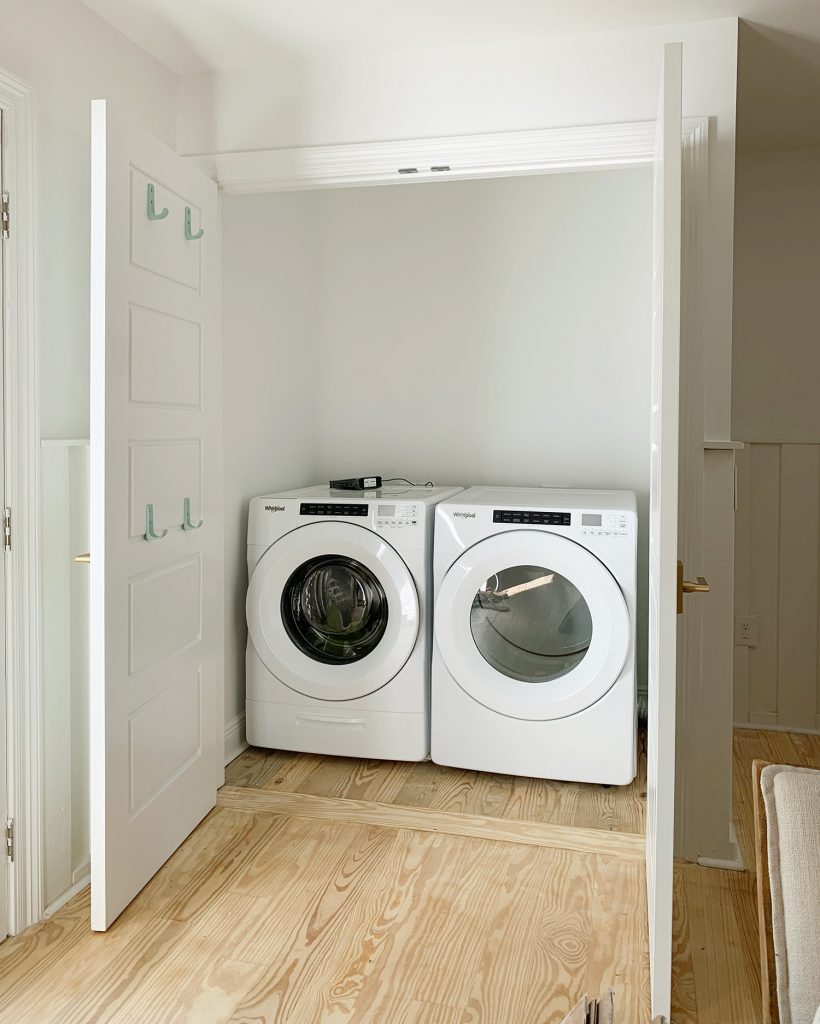
When we moved in, our laundry closet looked like this. All of this empty space above the washer and dryer was basically mocking us as box after box came in from the pod and had nowhere to be unloaded.
This closet is located just to the left of our front door (seen below from this post where I am a cell phone model just waiting for Tyra to call me).

It’s an unusual spot for a laundry room but our first house (which was closest in size to this one – just around 100 square feet smaller) had a laundry “nook” that was actually pretty similar. It was also located right near the door that we came in and out of everyday – and thanks to some shelves and a big ol’ counter it packed a ton of function & storage into a very small space. In fact you could say that our new laundry closet was directly inspired by our first house’s setup (seen below) because it worked so well for us:
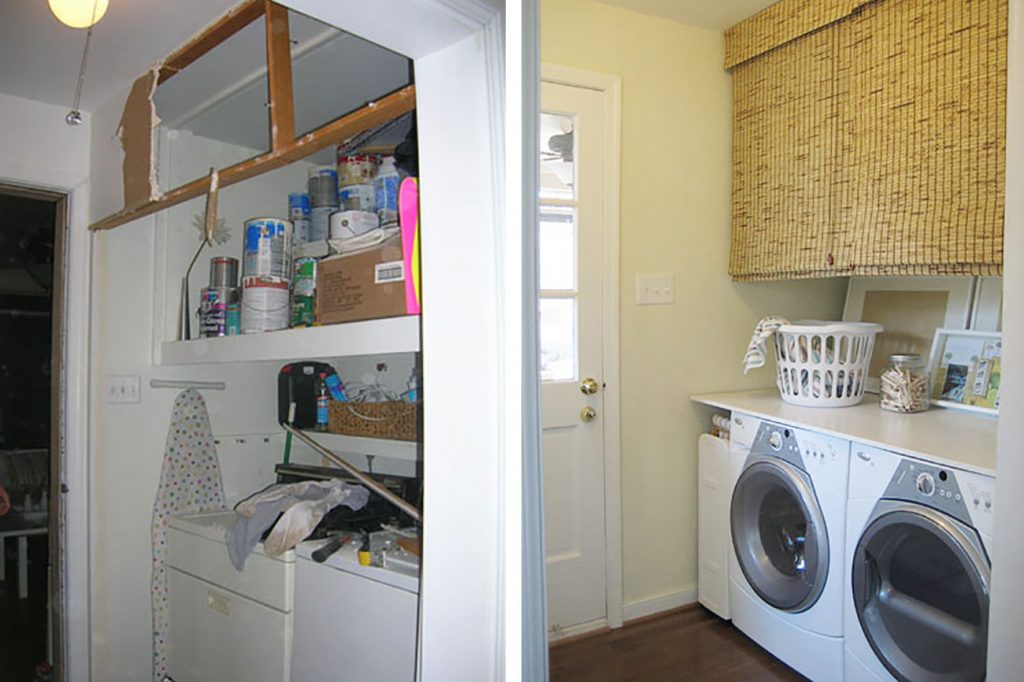
Who remembers waaaaaaay back in 2007 when we busted out the bi-fold doors that concealed our laundry appliances (I think it was our first wall demo ever?) and added a simple plywood counter and woven blinds that concealed lots of stuff on those storage shelves.
We also made the decision to go back to a front-loading washing machine so we could earn that huge stretch of counter space back. We really liked our top-loading washer in Richmond…
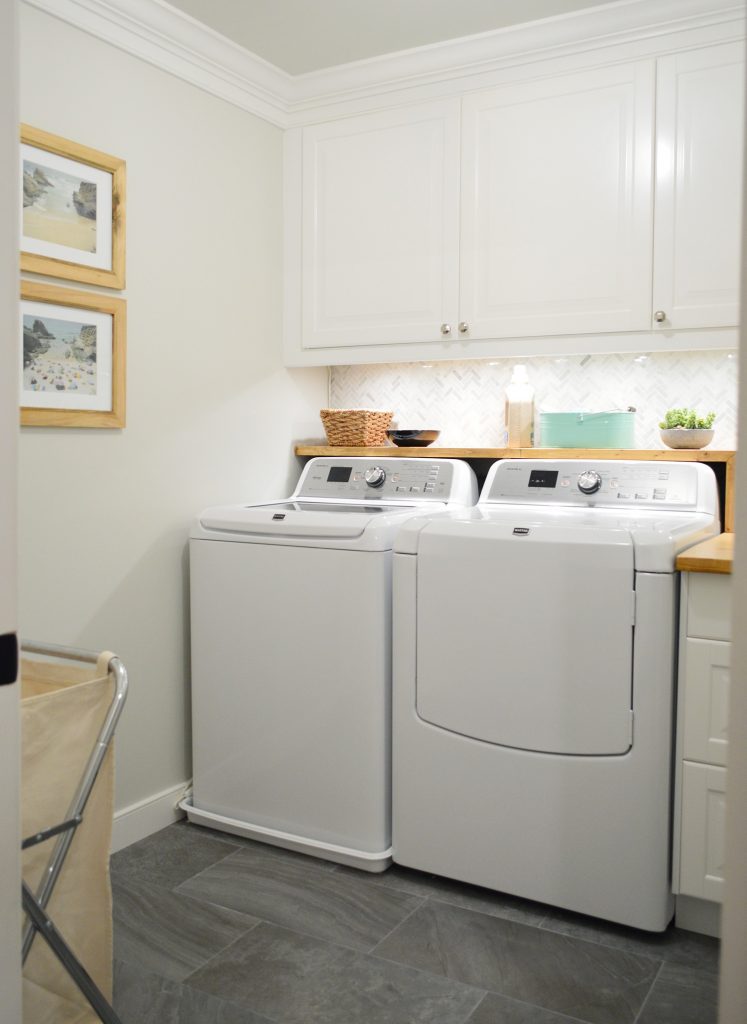
…so much that we basically duplicated it in the beach house mudroom, shown below).
Our pros to a top loader are: we felt like we could stuff in larger loads and it was easier to fill it with some water and let things soak if we had some stains we wanted to try to lift out by soaking. So I’d say that a top loader is still something that we really really appreciate, but storage space & extra function took priority here since it’s a much smaller house, so we switched back to our front loader setup from our first house since we knew it would would work well for us in a closet/nook situation.
As for how we chose this specific washer & dryer, Whirlpool / Maytag is the only brand we’ve ever purchased over the last 14 years of homeownership, including in the beach house & duplex, and we have not had a single issue with any of them ever – which makes this our SEVENTH SET OF THEM (!!!) – hence us sticking to the same brand. These had the best ratings of all of their front loaders, and we have had them almost 7 weeks (since we moved in) and so far we’re very happy with them.
But now let’s get to the fun part: building the actual shelves and counter.
If you’ve seen our tutorials for building pantry shelving or built-in bookcases, the system here is the same because it works every time. A plywood or MDF top resting on wood brace pieces secured to the wall in 3 places (along both sides and the back). We used this method for the upper shelves in here as well as the counter.
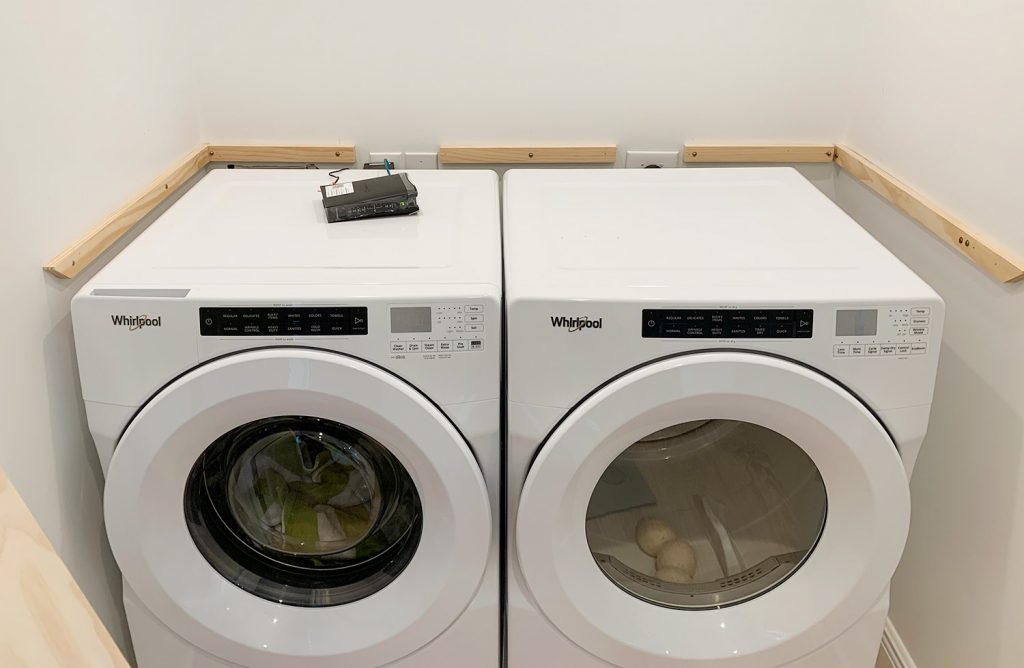
In our first house, we simply rested the plywood counter directly on the appliances (if memory serves, I think we put a rubber rug pad between them to keep things from sliding around). Here we decided to float the counter ever so slightly over the appliances. That way if a big load ever rocked the washer or dryer, it wouldn’t rub or rattle the counter. So we carefully measured the placement of our brace pieces (which are just 1×2″ pine boards) and – using a level to keep them straight – secured those brace pieces to the wall into studs with 3″ wood screws. You can also see how we left gaps in the brace pieces where the plugs and water line ran.

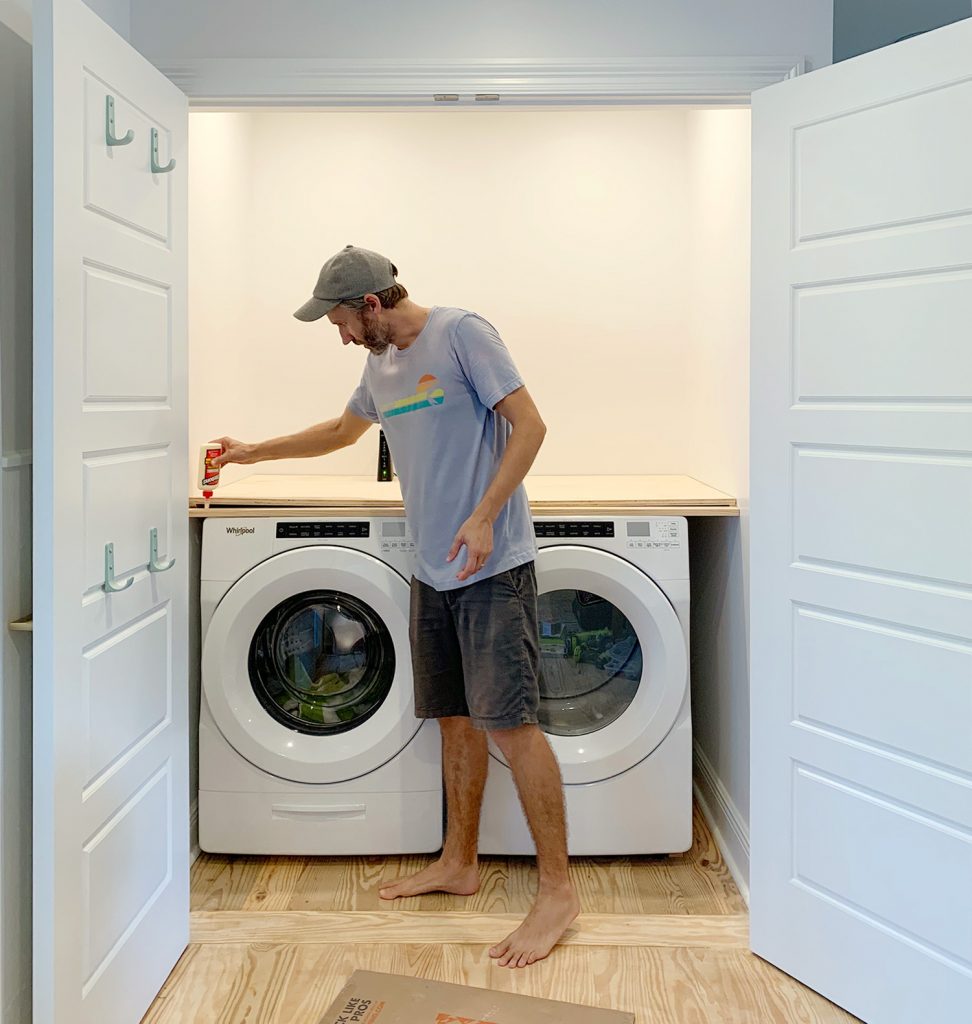
Then we rested a piece of 3/4″ plywood across it to create the counter (you can usually have the store cut it to size for you while you’re there – or you can do it at home with a circular saw). To finish off the raw front we glued-and-nailed another piece of 1×2″ pine across the front.
You can see in the photo below how the counter sits just a hair over the top of the appliances. You can also see how we used that extra sliver of space next to the dryer as a spot to hang a dust broom and a collapsible stool (so Sherry can reach the top shelf whenever she needs to).
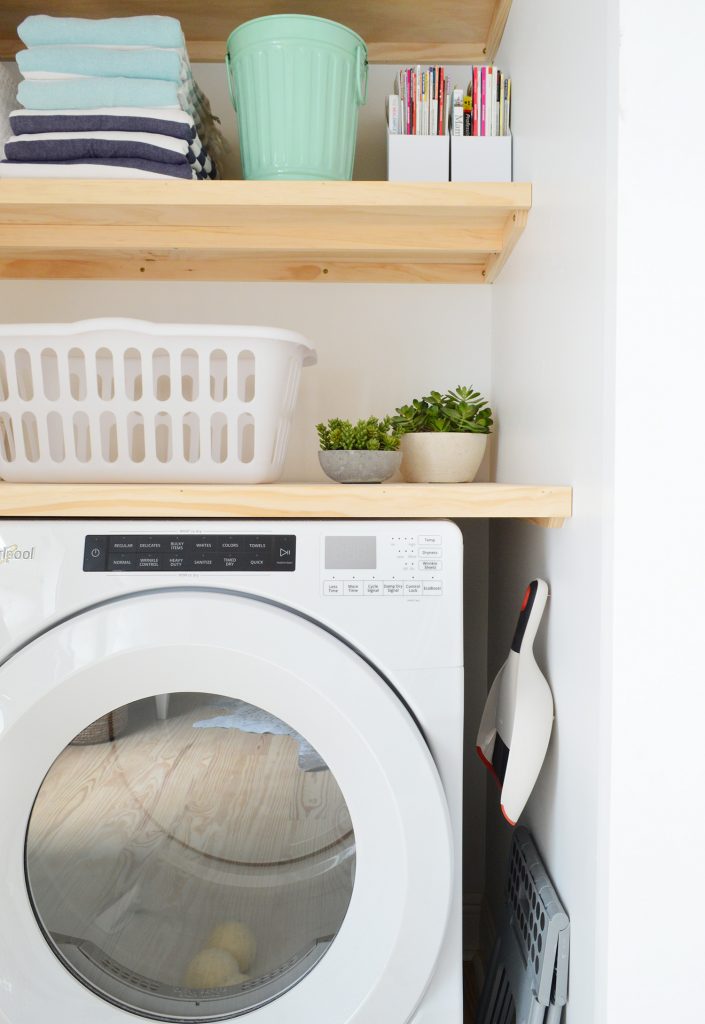
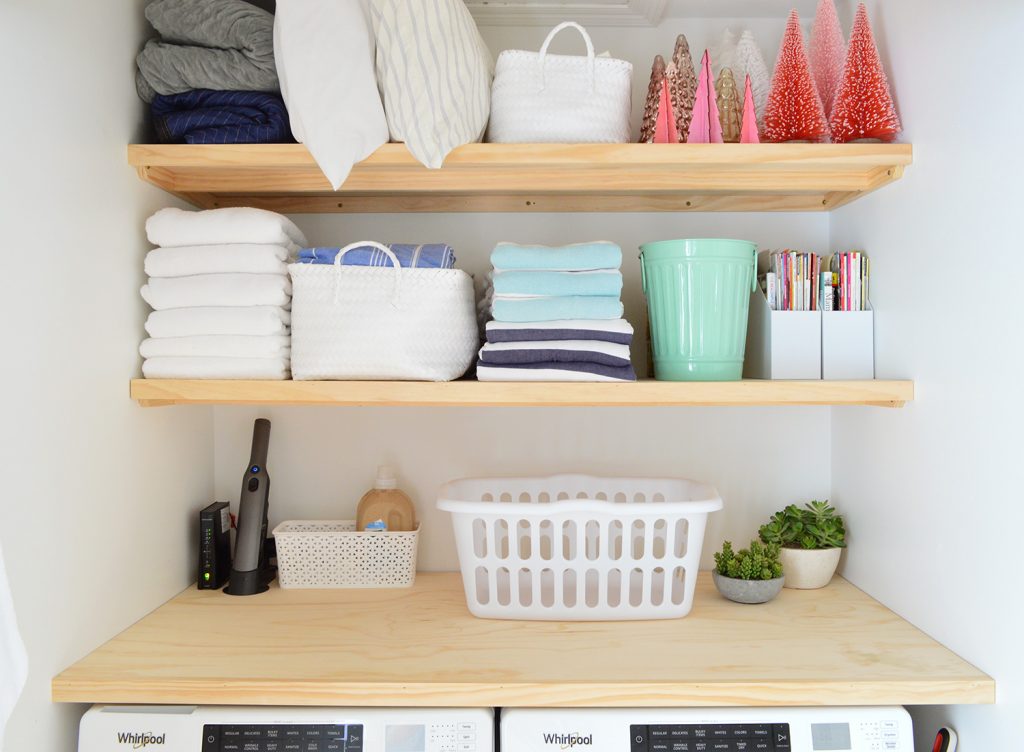
We used the same process to create the upper two shelves, with only a couple of adjustments. For one, they’re shallower – only 18″ deep instead of 30″ deep like the counter. We actually would’ve made them deeper except that we have an attic access door above the washer & dryer, and anything deeper would’ve made it impossible to get in there (it already requires a ladder and some upper body strength as it is). Nothing fun is up there, we just have to be able to access it to check on plumbing & electrical stuff if needed.
The other difference is that we ran an additional 1×2″ brace piece across the middle of each shelf (as you can see in the photo above). This was to lend a little more structural integrity to those shelves so they could handle heavier objects without bowing. You know like 437 bottle brush trees if Sherry’s streak continues…
Speaking of which, the counter would probably need some additional support in the middle if you expected it to handle heavy objects (maybe even a large metal bracket between the two appliances?). We mostly wanted it as a drop zone for a laundry basket or a pile of clothes, so tons of weight wasn’t a concern of ours.
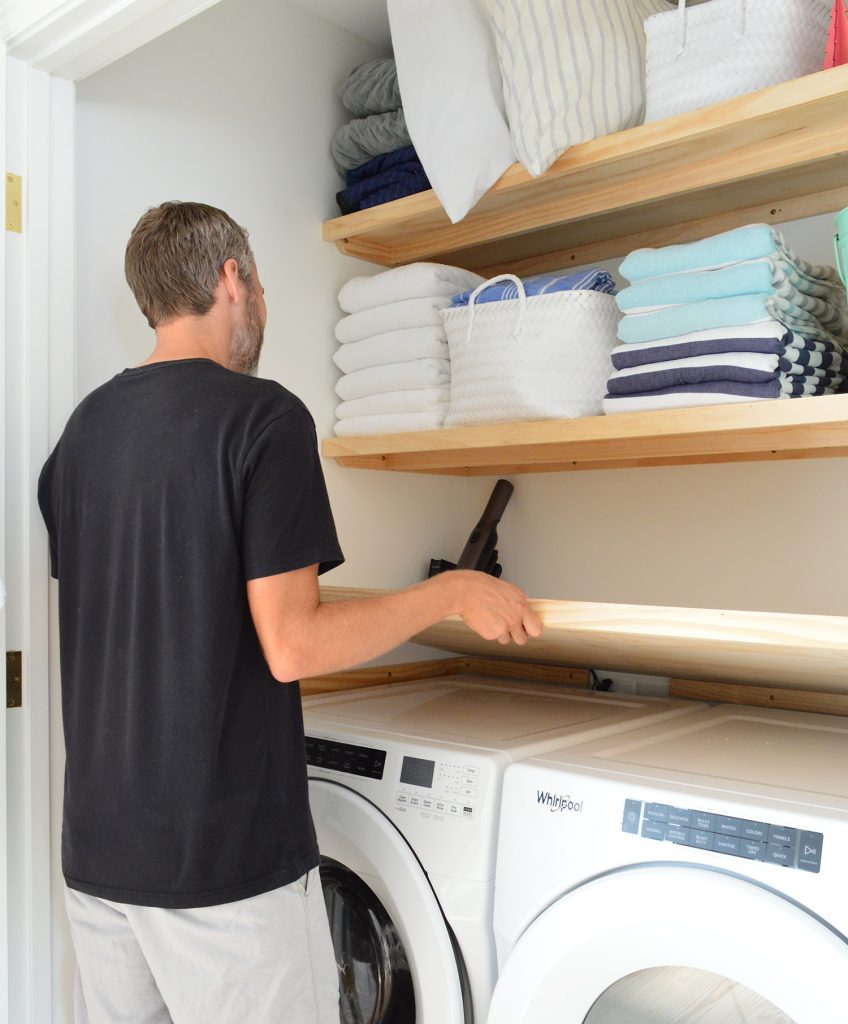
Oh and that picture reminds me of a third difference between the shelves and the counter. The shelves are nailed into the brace pieces so they stay put, but the counter is just resting on its braces, which makes it easy for us to lift it up or fully remove the counter if the appliances ever need to be serviced or we need to access the plugs back there.
Oh and because we always get asked this when people see that we own front loaders, here’s how we keep a front loading washer from getting grime-y:
1) Always leave the washing machine door open after you run a load so it can air dry. This is so ingrained in us that we often absentmindedly did it when we had a top loader too. Thankfully this closet is deep enough that the washer door can be left about 8″ open to dry out while the main closet doors are fully closed. So if you’re planning a laundry closet with front loaders, some extra depth is really nice for that purpose.
2) We run these tablets called Affresh through the washer every once in a while, which also really keeps things clean (this isn’t sponsored we just buy them and they work – we used them for all 5 years with our front loading washing machine in our first house).
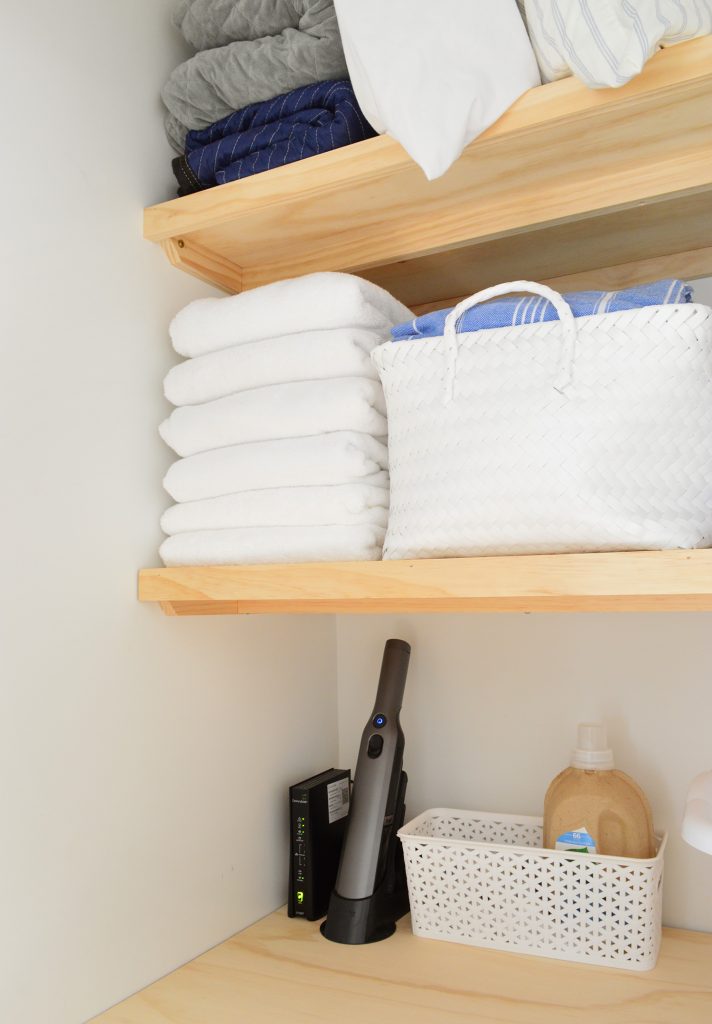
We still need to put a coat of sealer on these shelves and patch some nail holes, but overall it was such a quick project that earned us some desperately needed storage. Someday we may concoct a more elaborate makeover for this space (you know Sherry’s a fan of a tiled laundry backsplash), but for now, the raw plywood shelves and these cheap plastic hooks that we threw on the back of the doors are making us feel like Mr. and Mrs. FancyPants*

*We’re the type of fancy where your laundry room features a mishmash of linens, towels, mini Christmas trees, purses, leopard print scarves, and your wi-fi router. So in other words, REAL fancy.
P.S. If you’re interested in seeing the narrow hall closet that we mentioned as another spot where we added shelves, that photo is on this podcast show notes page if you scroll down – and to follow along with our entire reno of this house, you can see every single update we’ve made right here in this FL House archive.
*This post contains affiliate links, so we may earn a small commission when you make a purchase through links on our site at no additional cost to you.
